How we tag the turtles for release at the Turtle Conservation Centre
At the Two Oceans Aquarium Foundation's Turtle Conservation Centre, our dedicated team rescues, rehabilitates, and releases five of the world’s seven turtle species. All turtle species are listed as vulnerable to extinction on the IUCN’s Red List of Threatened Species. Thus, our Turtle Conservation Centre’s work has a far-reaching impact on the survival and protection of these endangered species.
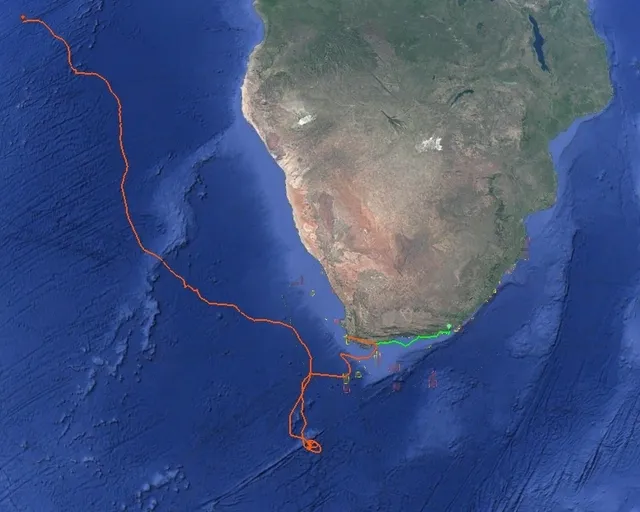
Tagging is a huge part of this vital work and a central part of marine science and conservation efforts. At its core, tagging is about identifying individual turtles. However, depending on the tag type, researchers can also track turtles’ migration patterns, nesting sites, growth rates, and distribution. Tagging is an invaluable tool for the Turtle Conservation Centre, providing us with incredible insight into the post-rehabilitation movements and lifestyles of our turtles.
What types of tags are used?
Flipper tag: A flipper tag is just what it sounds like - a small, unobtrusive device on the turtle’s flipper. Flipper tags are typically made from metal, like titanium, or an alloy that resists saltwater. Despite being quite basic, this type of tag can identify the turtle and provide scientists with important information, such as the date it was tagged and the place of release. These details are stamped onto the tag by way of a numeric code.

Acoustic tag: These tags are externally attached to the turtle. Acoustic tags are so named because they transmit a high-frequency noise that is picked up by acoustic receivers placed along the coastline. Tagged turtles can be tracked for anything from days to years, with study duration determined by battery life, attachment efficacy, and data complexity.
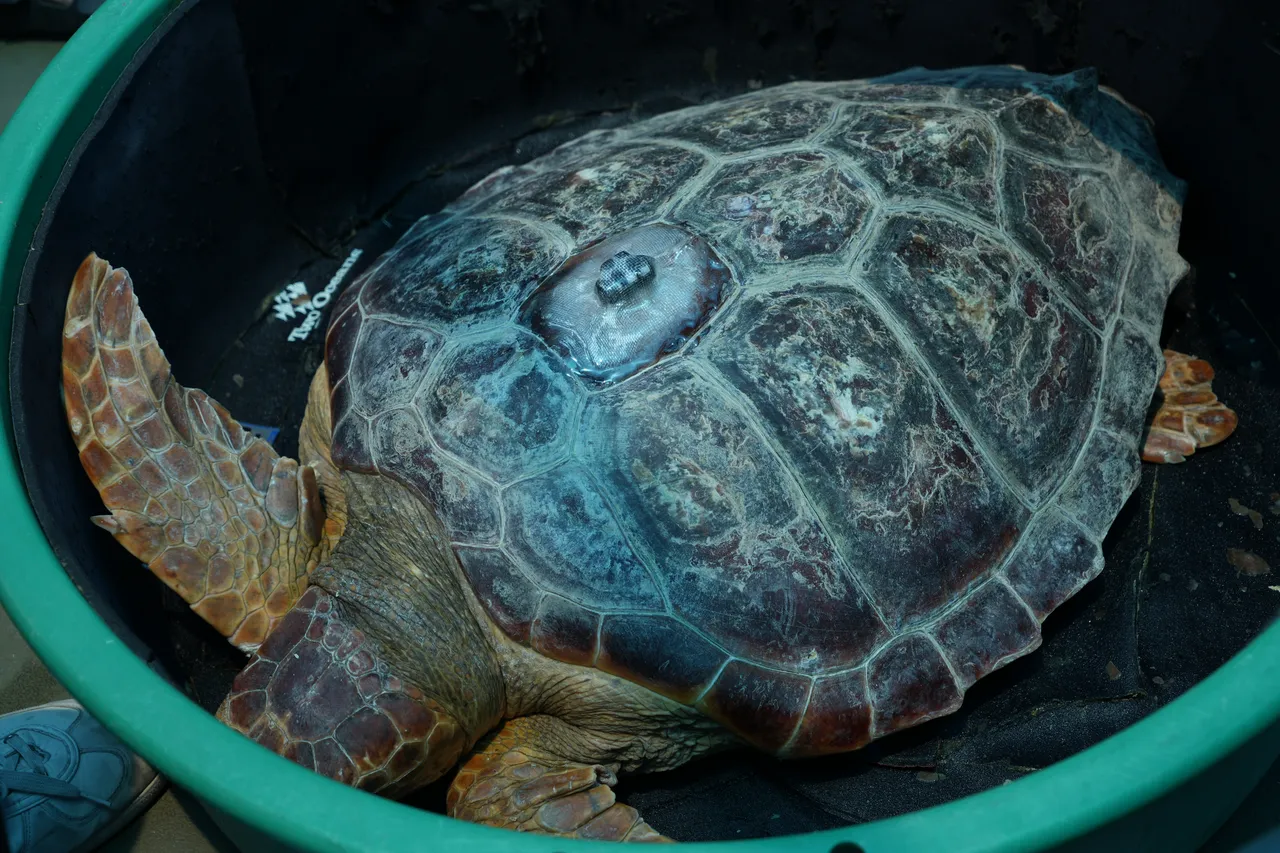
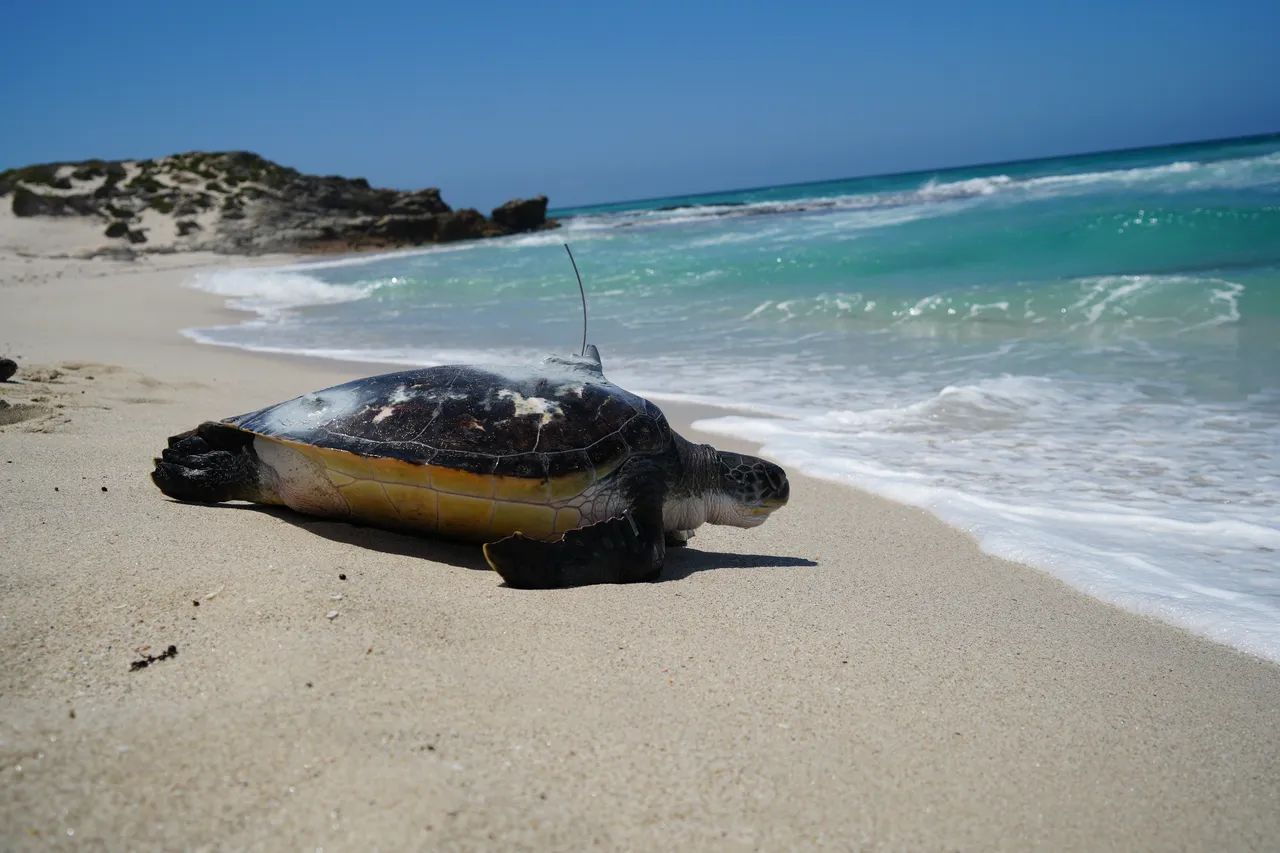
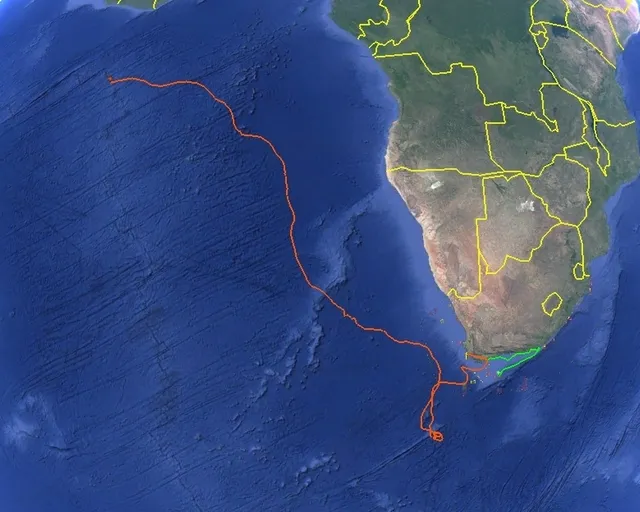
Satellite tag: These are radio transmitters that are attached to the turtle’s carapace (top shell). Satellite tags emit signals that are detected at certain time intervals by satellites orbiting the Earth. Satellite tags can provide GPS coordinates, dive time, depth, swimming speed, and even water temperature. This information can be used to plot the turtle’s path around the world.
Let’s look at how our team does acoustic tagging…
The placement of the acoustic or satellite tag is very important – the tag should not hinder the movements or behaviour of the turtle at all. Satellite tags will typically be placed on one of the central scutes (shell plates) towards the turtle’s head. This is the most hydrodynamic position in terms of turtle swimming patterns and allows the antenna to successfully breach the water surface. Acoustic tags are placed similarly or on the marginal scutes (near the edge of the carapace).
So, let’s dive into how our Turtle Conservation Centre team tags turtles.
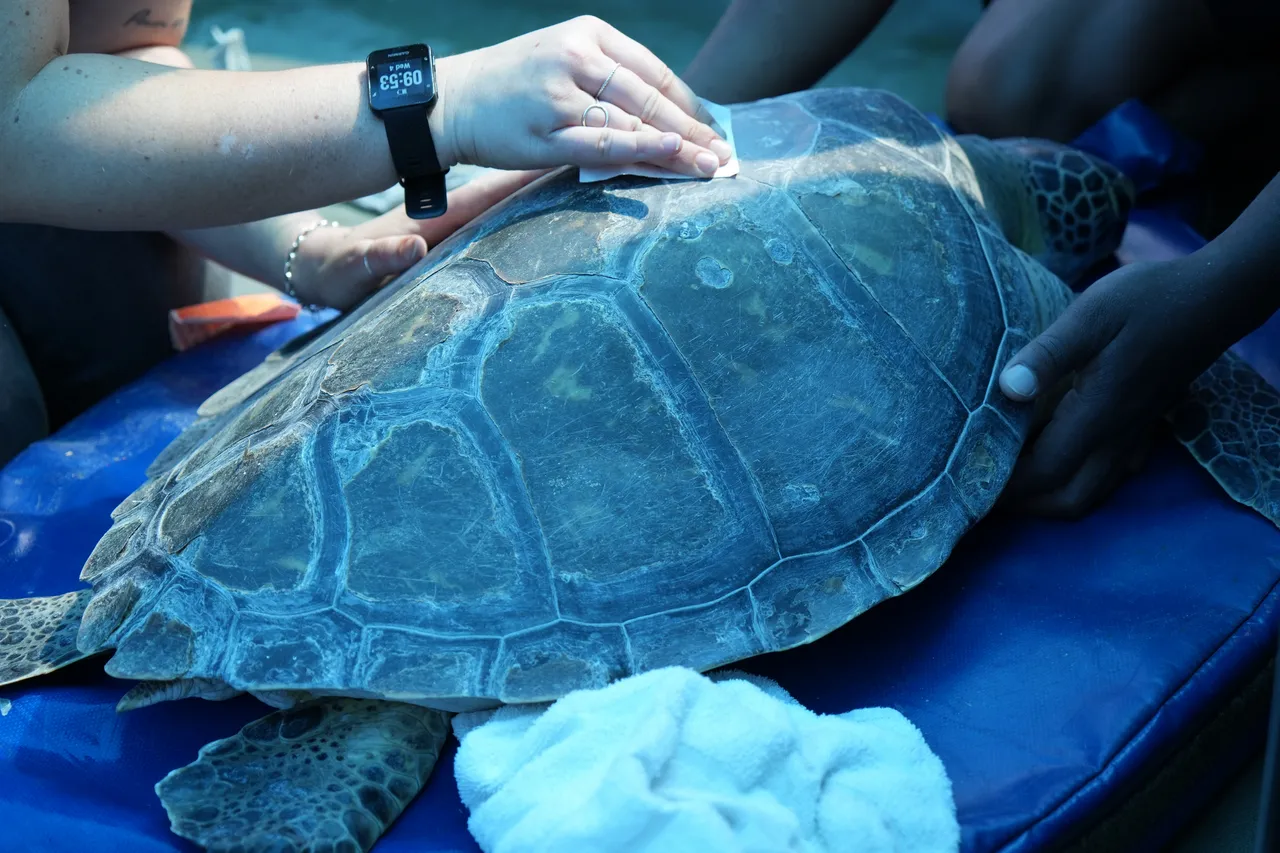
Step 1: Sanding time
The first step is to sand the area where the tag will be placed. This makes it easier for the glue and tag to grip onto the otherwise smooth carapace. Using mild sandpaper, the team gently sands the turtle’s carapace until a suitably grainy texture is reached.
Interestingly, the time spent sanding depends on the turtle species. Green turtles have softer, oilier shells than other turtles. This means the team sands for a much shorter time, while loggerhead and hawksbill turtles have harder, thicker shells that require a bit more time to get the proper texture.
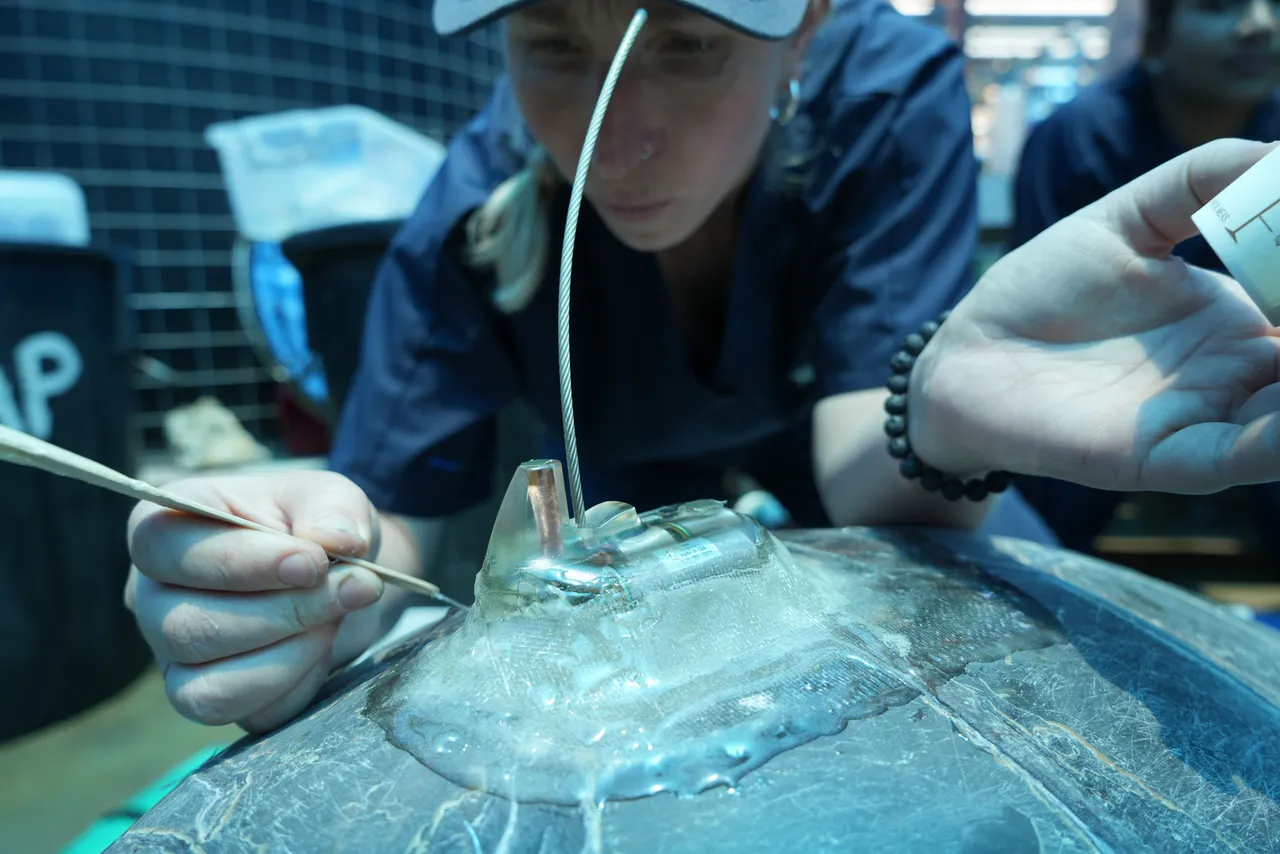
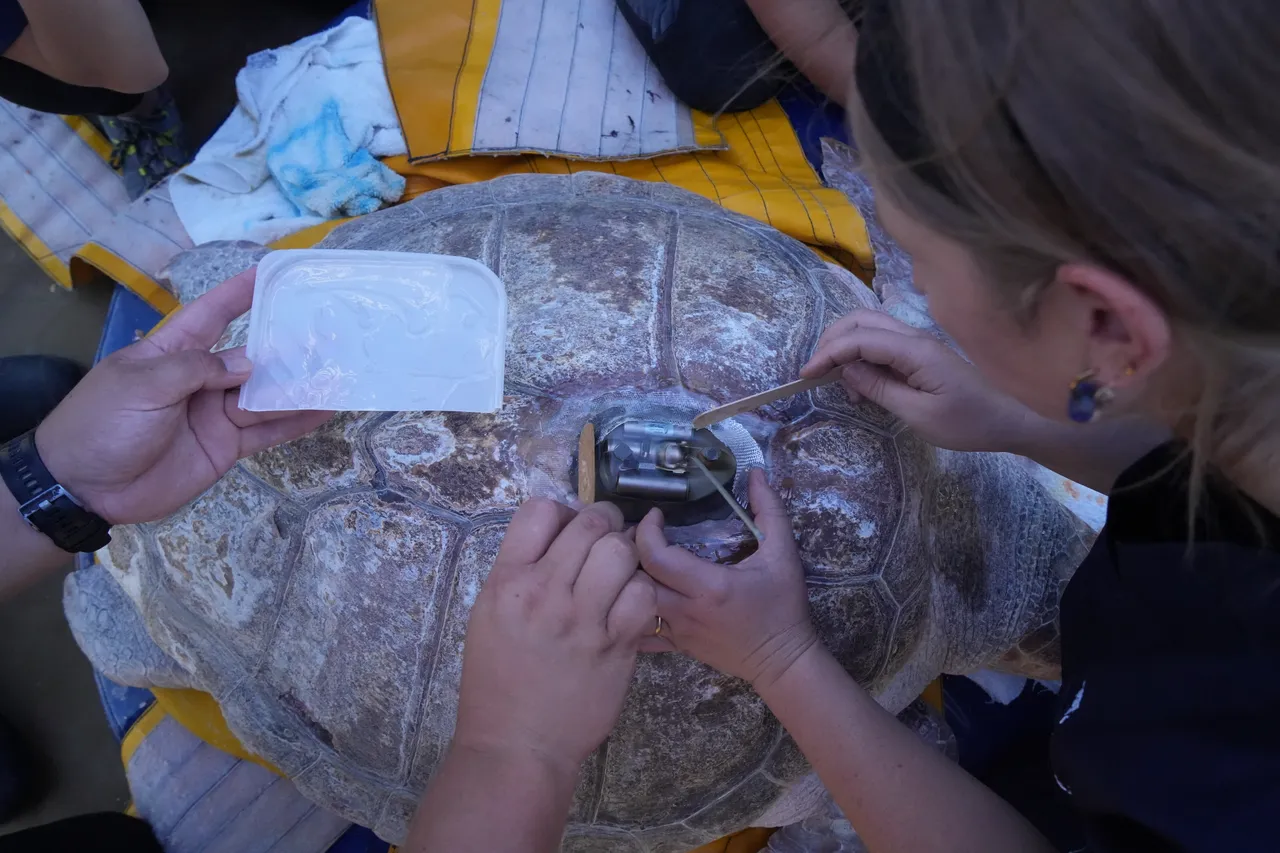
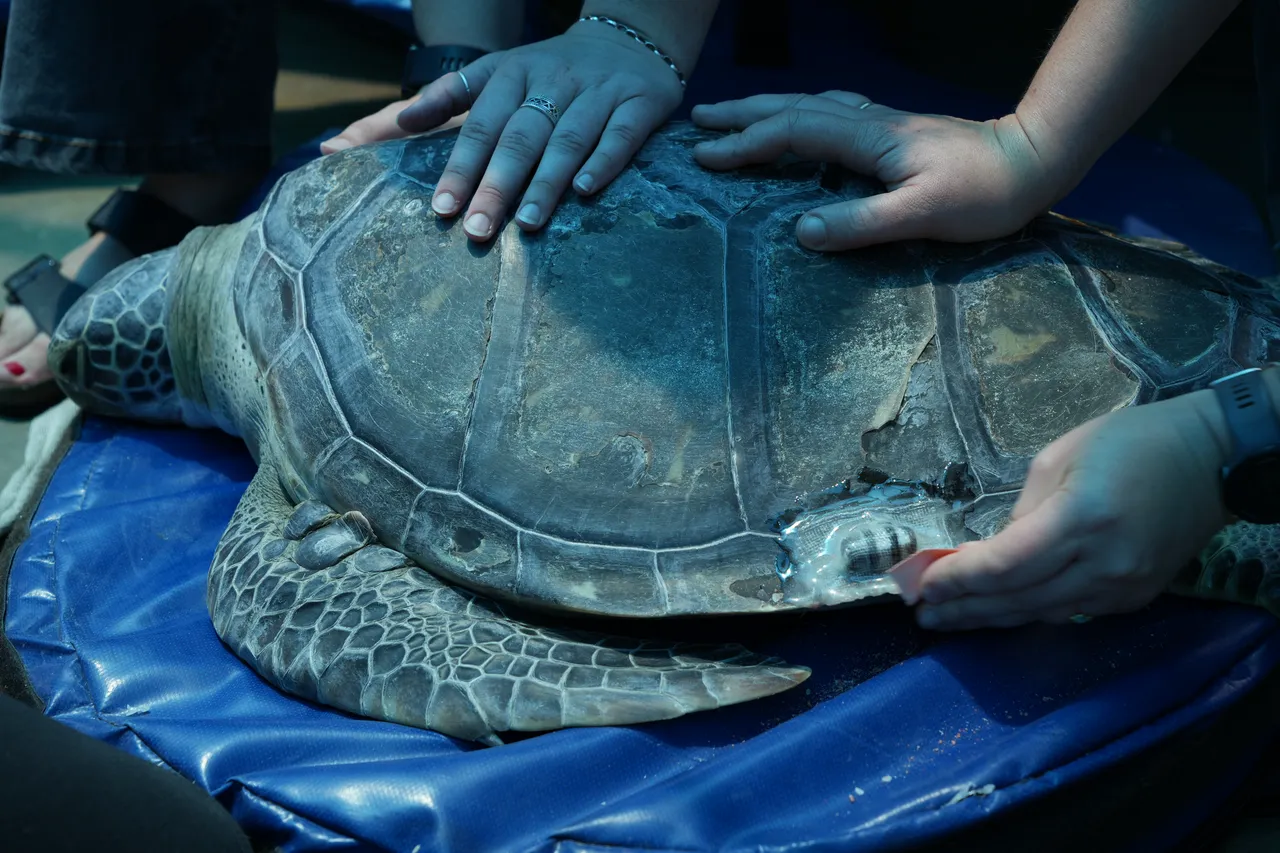
Step 2: Placing the tag
Once the carapace has been sanded sufficiently, a piece of fibreglass (with cable ties threaded through) is cut, shaped, and placed on the grainy area. Then, a layer of epoxy (a special glue) is applied on top of the fibreglass. The tag is carefully placed on top of the fibreglass, and the cable ties are secured.

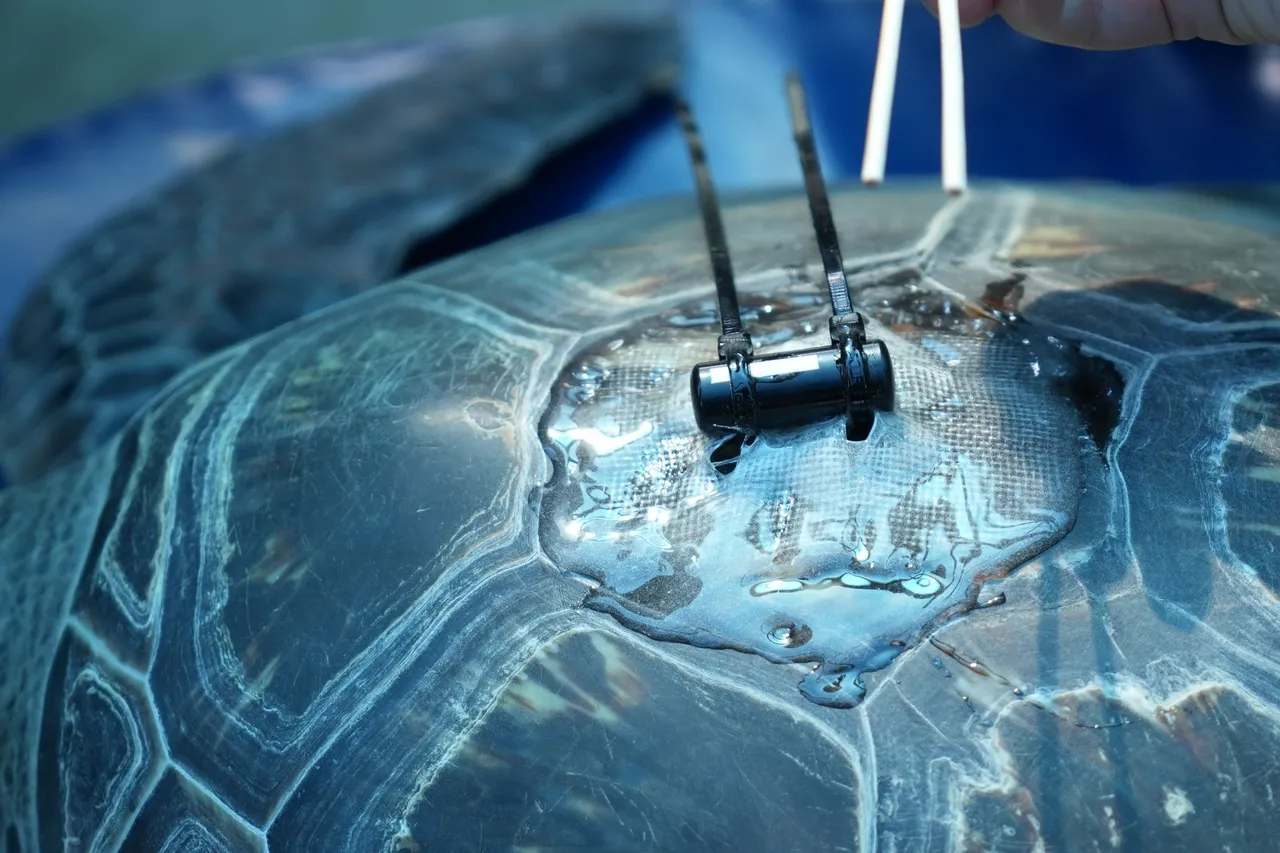
Step 3: Layering is key
Another layer of fibreglass is placed over the tag and covered with epoxy. This ensures that the tag is super secure and will stay in place as long as possible. At this point, the team also makes sure that any air bubbles or bumps are smoothed out.
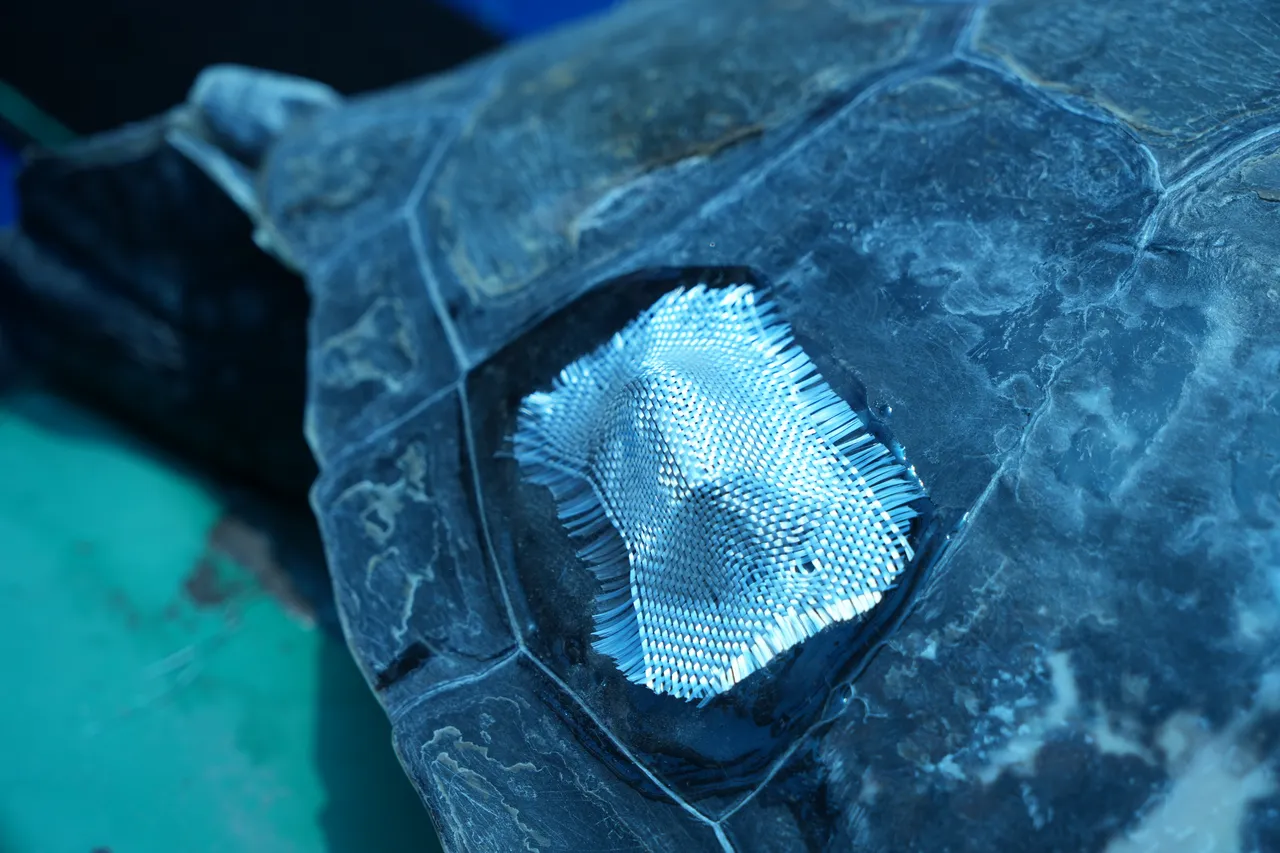
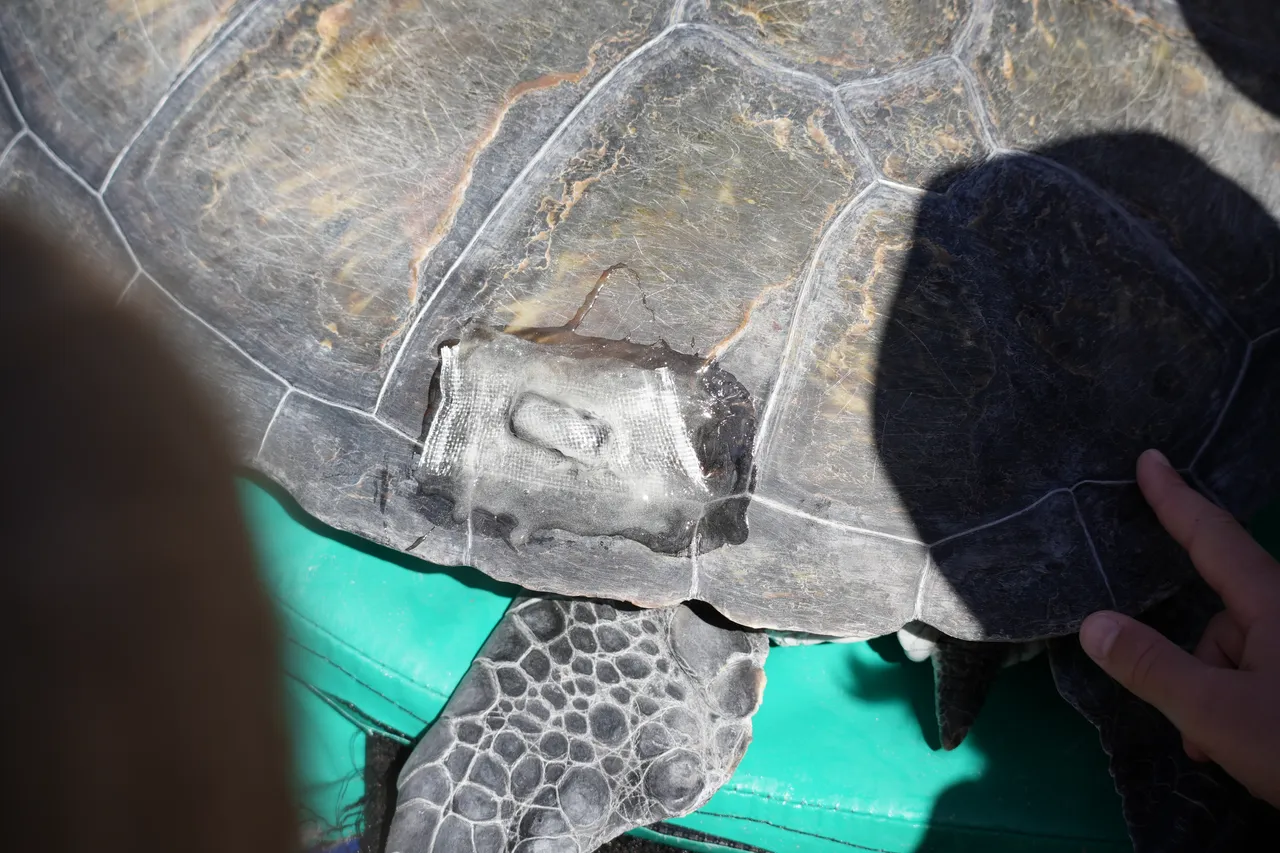
Step 4: Let it set
It is important to let the epoxy set fully before the turtle returns to their holding facilities. The team often uses this time to sand down any rough edges on the hardening epoxy.
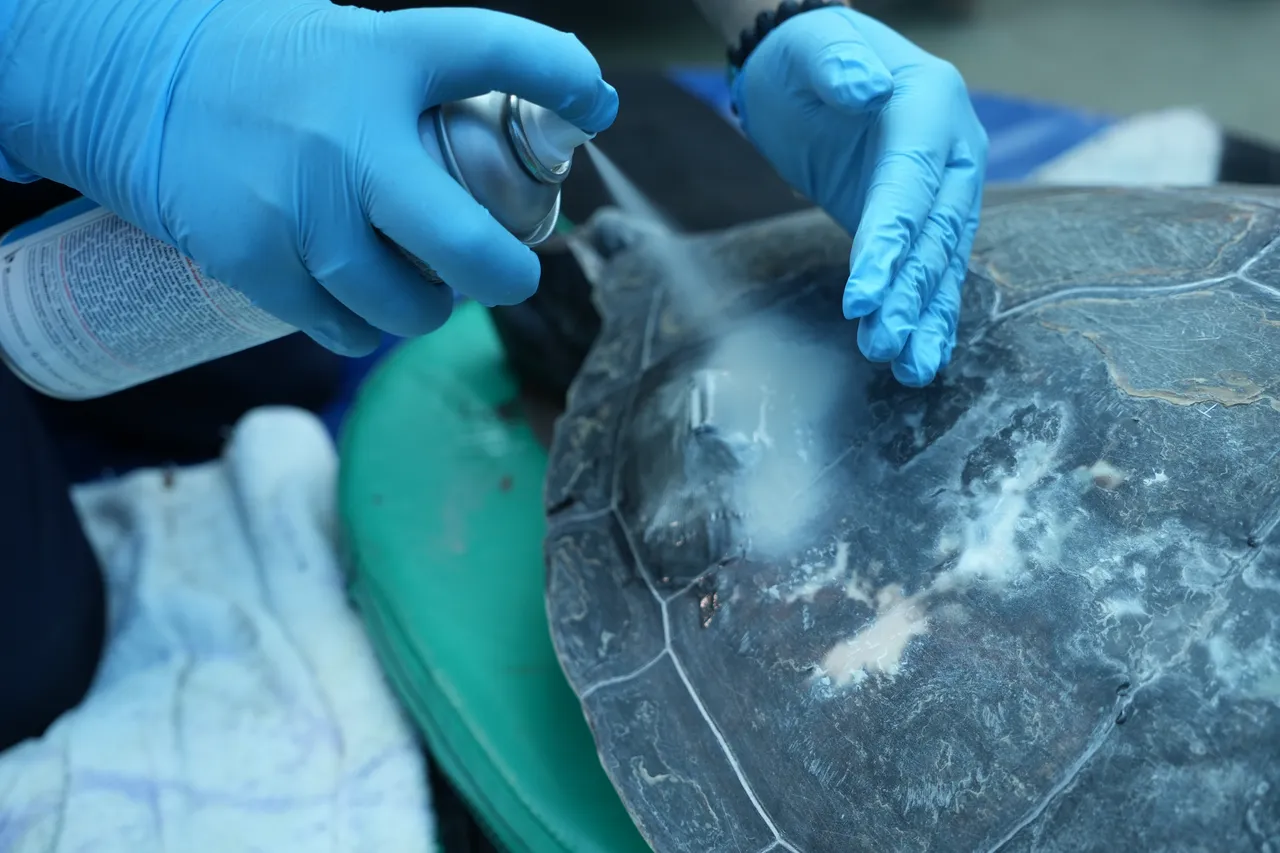
Step 5: Lastly, spraying
Once the epoxy has hardened completely, the team sprays the entire tag with an anti-biofouling spray. This discourages algae and barnacles from growing over the tag and interfering with transmission.
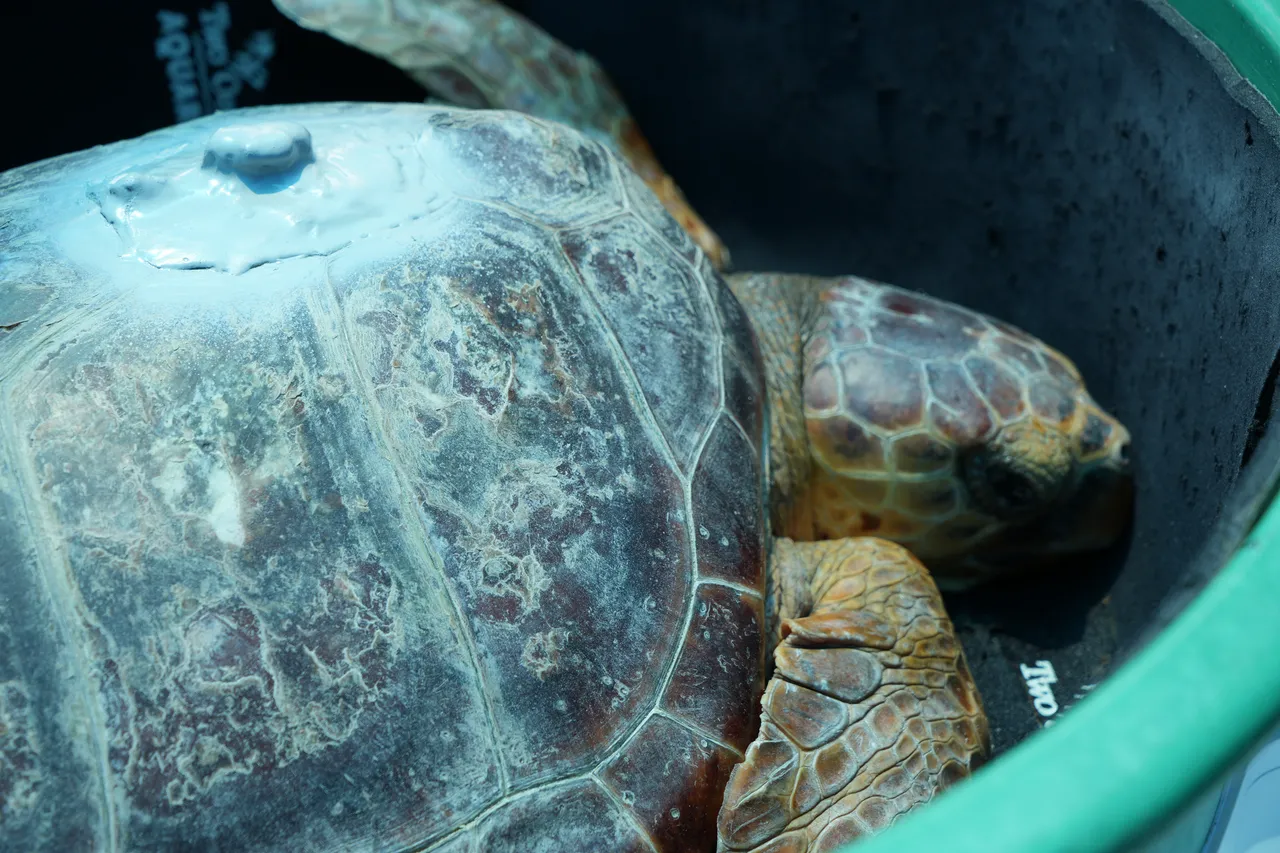
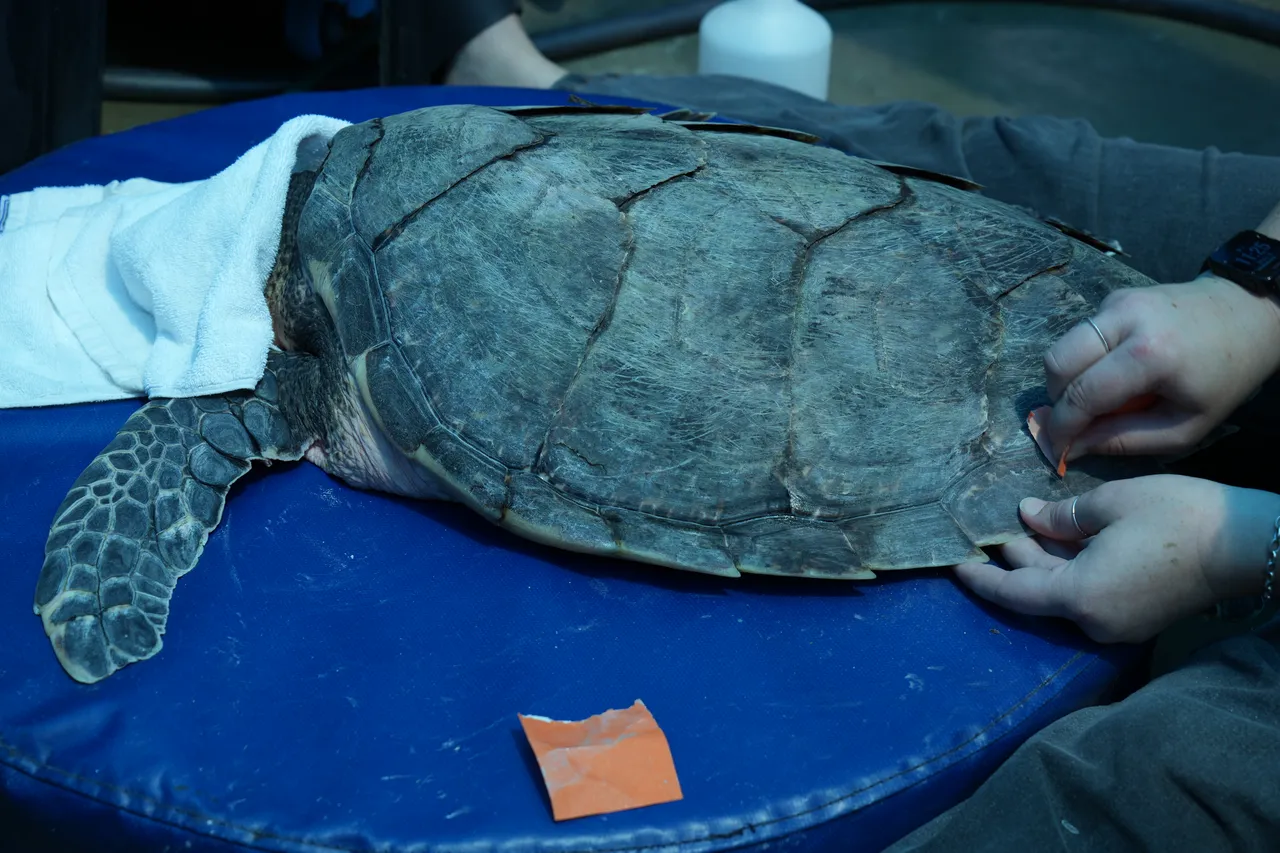
Step 6: Return to the ocean
Once their tags are set and ready, the turtles are, too! The final step in the tagging process is release back into their ocean home. This is always our Turtle Conservation Centre’s goal – we are dedicated to making a difference for these endangered species.
Related News

Sign up to our Newsletter
Receive monthly news, online courses and conservation programmes.